Friday, April 30, 2010

Exhaust

Thursday night seems like a good night to build an exhaust. So I did. Thank god FedEx got a clue and delivered my mandrel bends on time - without any fuss. (Long story about FedEx and not delivering stuff - for another time.)

The stock exhaust is extremely restrictive and being an off-road, trailered only car, I have no need for items like; catalytic converters, resonators, non-mandrel bent 1.5" tubing. I ordered up some 2.5" mild steel thin wall tubing from Columbia River (http://www.mandrel-bends.com/). I was passed to that site by a friend awhile back - they offer good consistent products for good prices. I also had to run to Napa to get a 10' strait section of pipe which would of been killer on shipping.

So the goal with all my exhausts is mainly to make them as short and as strait as possible to maintain flow and reduce turbulence. The downside is I have to mate it to my aftermarket axle back for those tracks with noise restrictions. I'm going to add a little strait pipe to bypass the muffler for all the rest.

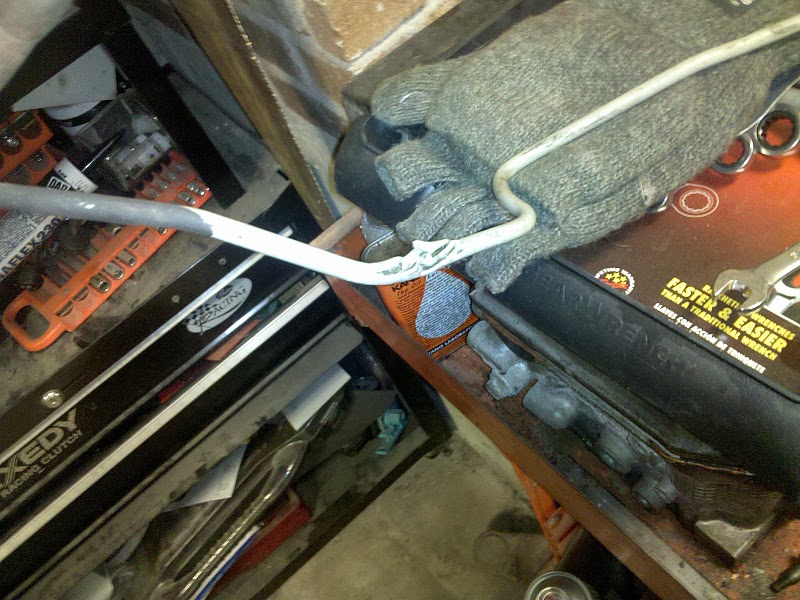
I started with the largest strait section first, putting it on jack stands trying to get it as close to the body as possible. The transmission cross member required me to jog it out a little and then make a hard 90 back into the header. I cut a few 45 degree bends at strategic points and joined them with pie cuts (cuts of a mandrel corner). At the tail section I made a small jog just to locate the main strait section to the rearward flange to mate with the stock axle back. Top it off with an o2 sensor bung and called it a night. (My dog felt the need to try to clean my new exhaust... sigh)

Tuesday, April 27, 2010

Overlays

Decided to throw on some yellow vinyl overlays on my headlights... This really serves two purposes - 1) It counts as "Taping your headlights". A lot of racing/HPDE clubs will have you put tape over glass headlights to keep the shrapnel down if you were to hit someone or something. The overlay is like one big piece of tape. 2) The yellow hue allows me to be seen a lot better in the rain or in low light situations. If I ever race in rain, fog, humid summer day... whatever - I'll be able to let the driver in front of me know I'm there.

The installation was kind of crude. I used a heat gun to stretch the vinyl over the headlight and sprayed the back adhesive with some water to give me a little time to position/push out the bubbles. It was a little tedious and didn't come out perfect but I'll make due.

Wednesday, April 21, 2010

Cage Padding

Installed my roll bar padding last night. Stuff cost me an arm and a leg but it's required by safety regulations to have it. Bad part is, since I have to have an instructor as I run with these new clubs, I need to have it installed on both the driver and passenger sides of the car... so $300+ later, I have the padding...

The install was pretty strait forward. I used the 1" SFI certified high density padding and just cut it to length with a hack saw and notched where the padding crossed pipes with a 2" hole saw. I started with the longest pieces first. All the straits with minimal overlap of other pipes - so the a-pillar tubes, top door bars, rocker bars, etc. Then I worked from longest to shortest to make sure I was using my padding resourcefully. There are a lot of bars in this cage, haha. and even with 40 feet of padding, I still had to cannibalize some extra from my endurance car.

I secured the padding with black zip ties that were included in the package (they are horribly dry and brittle, but I made it work). I'll most likely replace them down the road with a thicker zip tie to get a tighter fit.

Tuesday, April 20, 2010

Action Shots

Finally found some pictures from the SCCA Auto-X on the 11th. These aren't the best and I'm working on getting some video, but they work. Interestingly enough they do show the full body roll on both images as I'm hard into a corner - virtually none haha. I've been thinking about coming down in the rear about another 1/2 inch, but I'll 1) need to wait until RaceComp sends me my new springs and 2) see the other side of the body roll (fully compressed) to see if I'm too close to the fenders.

Monday, April 19, 2010

Side Windows

So over the weekend I put in some temporary lexan side windows mainly for transporting the car. I bought some C channel aluminum, screwed it to the inside of the door and set the lexan down in. When you close the door you can tuck the lexan under the weather stripping to make a fairly water tight seal. I may have to apply a bit of tape to the vertical face at the rear of the window just to make sure it is sealed and doesn't fly off during towing. Still trying to diagnose why my damn STRI oil pressure gauge won't work - I think the sensor has failed which really frustrates me. But I guess that's part of it haha.

Friday, April 16, 2010

Nice to come home and...

...see new parts on the table! - My D-Ring kit came (for the Hans) and my wide, 17" rear view mirror. I've used these mirrors before on my endurance car and they are awesome. You almost don't even need side mirrors as they let you see almost 2 lanes to the left and right. New Jersey Motorsports Park isn't going to work out - I was on the waiting list and no one canceled (despite the impending rain...) Oh well - Next event will be an Auto-X next weekend then on to Monticello in NY first week of May.

Monday, April 12, 2010

First Race

So I dropped her off the jack stands and took her for a spin in the driveway. She works! - No additional problems, actually sounds a lot quieter than I expected (with solid bushings). Eagerly anticipating my Sunday deadline I washed her up and made some minor tweaks to interior. I put my race numbers on the side and pulled her on the trailer.

5am on a Sunday is not my ideal time to wake up but I was very excited. a 2 hr drive up to Devins Air Force Base was pretty quick seeing Jeff and Todd were "late". They tended to motivate my right foot a little.

Despite the horrid SCCA format for their auto-x and the 6 hours of waiting around I did before I ran the car - oh my word did the car handle. I had a few people ask me "Is this on slicks?" (It's not by the way, haha.) The turn in on the car is ridiculous - not like any Subaru I've ever driven. It's very neutral and rotates on command. The motor held together after being beaten off the rev limiter a few times and feels very, very strong. The power band feels very linear and I caught myself wondering where I was on the tach just because the TQ was so sustained.

Needless to say I'm a happy camper. Now we prep for New Jersey Motorsports Park.

Friday, April 9, 2010

Clean Up

Last night I just spent some time working on my short list of "things left to do". I fastened the fuel and brake lines to the chassis and pulled them away from the driver/passenger's legs. On the fuel side I separated the main high pressure line from the return/vent lines just for the heck of it. Figured it would reduce any wear/breaks. I then moved to securing the interior wiring harness. Wrapped a a lot of the exposed parts in electrical tape and fastened it to the chassis. I also modified the seat bracket for the drivers seat to move it a bit closer to the pedals and bought some grade 8 hardware. Fixed the trim and I picked up my newly painted hood elements and fog covers.

Thursday, April 8, 2010

Another Late Night

So I'm down to the short list - tied up a lot of loose ends last night. Jack came over again and helped dial in the alignment now that the suspension bits are properly adjusted and modified. WRX axles were added to the rear (I was maxing out the RS axles). I laid out the harnesses to map out where I want to run them and reassembled the steering column electronics (headlights and wipers). I cleaned up the engine bay adding the timing belt cover and fabricating up a bracket to hold the power steering reservoir. Now I have to buy a few more minor things (trunk gasket, rear view mirror, bulbs for the brake lights, etc.)


Oh and you have to have a race dog :P

Wednesday, April 7, 2010

Dumb...

Note to self - "When raising the rear sub frame up - check to make sure things aren't going to be crushed due to lack of room!" - Last night I fixed up the brake line that broke. I had to drop the rear sub frame and remove the passenger side straps off the gas tank just to replace this hard line. The issue was when I raised the sub frame up 1/4 inch or so, I neglected to see there was a brake line run in a very tight area between the frame and sub frame. I ran a new line (with the help from Doug - he loves coming over and removing/installing sub frames) and put everything back where it was.
After everything was bolted back up I figured, what the hell it's 1am anyway, why not install the rear Lexan window. Done and done... Now I need to figure out how to attach the stock trim pieces...

Tuesday, April 6, 2010

Dialing in

So my time on Sunday was spent "getting" the car aligned - well it didn't work out as well as I would have hoped. We ran into some snags in terms of tire clearance and such so I brought her home and started to fix the issues. Jack from EFI Logics swung by to give me a hand.

The biggest pain in the butt was the rear springs - RaceComp Engineering gave me a 6" 340 in/lb rate rear setup with a helper that compresses to about 1 3/8" - I needed about 2" of extra clearance on the inside of the tire to be able to move the wheel under the fenders appropriately. We removed the helper and jacked up the springs and got the room we were looking for. After the spindle/strut was set, we set the camber plates to the middle (to give me adjustability out and in) and then shortened up the lateral links to pull the bottom of the tire under the car. Very effective - Jack really knows his stuff. (And I might add - Myles from RaceComp was VERY understanding about my situation and is going to ship over new springs/helpers to fix the clearance issue - Thanks!)

Moving to the front the camber plates I installed add caster when you add camber. Although that's nice - I think it will hurt adjustability on the track. We decided we'd just re-drill the strut towers to the "GD" style which allowed me to mount the plates where they will only add/remove camber without effective caster at all.

And then to top it off - I made my nice ABS plastic insert to mount the gauges :)

Monday, April 5, 2010

8 hours of sleep in 3 days

This weekend was nice, warm temps, sunny - and without sleep for me. I pulled an "all-nighter" Friday into Saturday trying to prepare for an alignment at EFI Logics in Bethel, CT. So besides the exhaustion - I made quite a bit of progress on the car.

First and foremost the engine runs! By 4am Saturday morning I was able to modify some Ebay stainless steel headers to extend them past the turbo cross member. The work was a little "rushed" but it came out ok. The headers are very low now so I may end up raising them up another 1/4" to 1/2" but I need to be sure they don't rub on the cross member and cause false knock readings. After cranking the motor for about 20 minutes to lube everything up - I connected the engine electrical and hit the juice - Bam started up within 2 cranks - perfect. Runs good, no weird noises - The car drives - but I still need to do a bit of work on a broken brake line which is 1) a hard line and 2) ABOVE the rear cross member (uggggg....).

Installed some hood pins to eliminate the hood latch and assembly off the nose of the car - Boy was that nerve racking at 6am drilling into my JDM Aluminum v6 hood. Once I figured out where the holes go it was cake from there. the biggest pain in the butt is just getting it all to line up properly.

After all said and done I pulled the car out of the garage and got 50 feet before a maxed out a rear axle and caused the diff to lock up hard. I had to remove the rear axles just to move the car on the trailer. Once loaded we were off to EFI to get the car aligned.

At EFI I noticed a scraping noise coming from the rear which was accompanied by 5 guys saying "Wow this car is hard to push, is the e-brake stuck?" Turns out I grabbed bolts for the rear calipers which were about 1/16" too long... I'll blame it on my delirious, sleep deprived state. Once fixed, we rolled the car up on the lift and Jack proceeded to fix her up. (also had a front windshield installed while I was there).

Friday, April 2, 2010

Steering Installed

Got the quickener back and installed. It did require a bit more "modifying" and tweaking than I would of expected for spending 500$, but whatever - it's in and it's working. The only hesitance I have is the brake pedal hits the planetary gear housing. That being said, the brake system is not bled which will dramatically impact how far/close to the floor the pedal goes. Larry from L&E Fabrication said it is normal and I won't have any problems. I hope he's right.

Also added another Lexan window to the drivers side and started to modify the headers for startup. The Ebay knockoffs I purchased were mislabeled on the site. They are made for the earlier 2.2 style motors which has a different head design - the distance between the L and R head ports is more narrow - so I have to extend them. It was also mislabeled as the size of the ports are NOT 1.5" they are 1.75" - which means the stainless pipe I bought to modify the headers - is wrong. I'll be looking for more steel.

Thursday, April 1, 2010

Side Windows + Steering

The next logical step to installing the rear window is the sides. Let me just say - the rear window was a pain in the arse compared to the sides. So much easier to cut, fit, and install. The only bad thing is where I'm mounting the lexan to - I'm screwing into the B-Pillar and I underestimated the structural integrity of it lol. Thin (aprox 14 gauge) steel is no problem, but these B-Pillars have triple and quadruple walled crazy engineered steel which requires me to drill it out. Self tapers have no chance lol.

Also received my steering column - before I installed it I did a final paint and prep on the floor and on the dash beam just to make sure that I wasn't going to hate my life later. It's much easier to get to everything with the windshield out. Paint looks nice, but I could only really afford to do the front to reduce the time I spend on this beast. Anyway - Tried to install the column and it's hitting some crap - I'll have to do more cutting/modifying.